

How To Make Water Animation In Photoshop

H2o Ripples Result In Photoshop
In this Photoshop Furnishings tutorial, we'll acquire how to hands add together realistic looking water ripples to an image! Photoshop ships with a filter designed specifically for creating a water ripple effect, but y'all'd never know information technology from the filter'due south name (no, it's not Ripple or Ocean Ripple, that would be too easy).
The filter we'll be using does a decent job on its own, only as nosotros'll see in this tutorial, by running the filter twice, using dissimilar settings each time, so combining the results, we can create a more realistic water ripple effect.
I'll be using Photoshop CS5 throughout this tutorial but any recent version will work.
Here'due south the epitome I'll exist starting with:
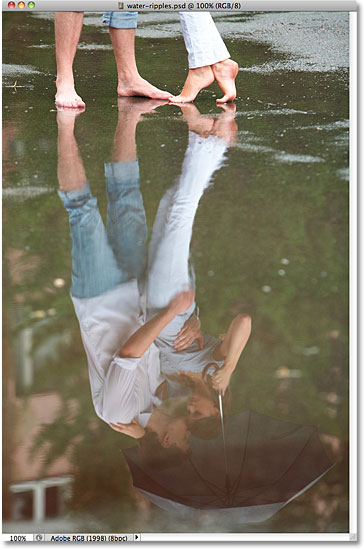
The original image.
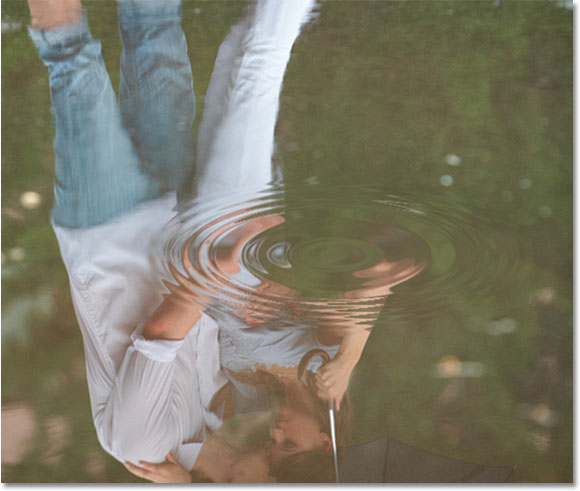
Here's how it will look after calculation some ripples to the h2o, every bit if raindrops are falling on the surface:
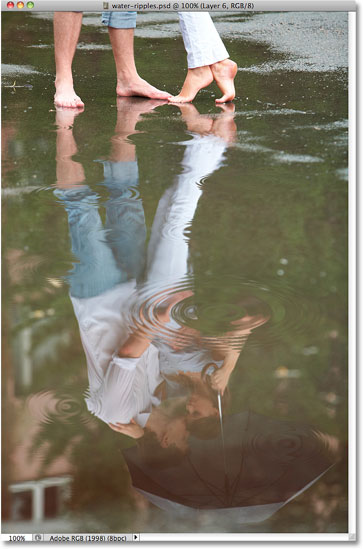
The final water ripples effect.
How To Create A Water Ripples Effect
Step 1: Select The Elliptical Marquee Tool
The first thing nosotros need to exercise is draw a option around the expanse where the water ripple will appear. Since water ripples are elliptical, we'll use an elliptical selection tool. Select Photoshop'due south Elliptical Marquee Tool from the Tools panel. By default, information technology's nested behind the Rectangular Marquee Tool so click on the Rectangular Marquee Tool'due south icon and concord your mouse push button downwardly for a second or 2 until a fly-out bill of fare appears, then select the Elliptical Marquee Tool from the menu:
Select the Elliptical Marquee Tool.
Pace 2: Drag Out An Elliptical Selection
With the Elliptical Marquee Tool selected, drag out an elliptical selection where y'all want the outset water ripple to appear in the image. Try to match the shape of the selection to the perspective of the image then that water ripples closer to you volition appear more circular than ripples further off in the distance:
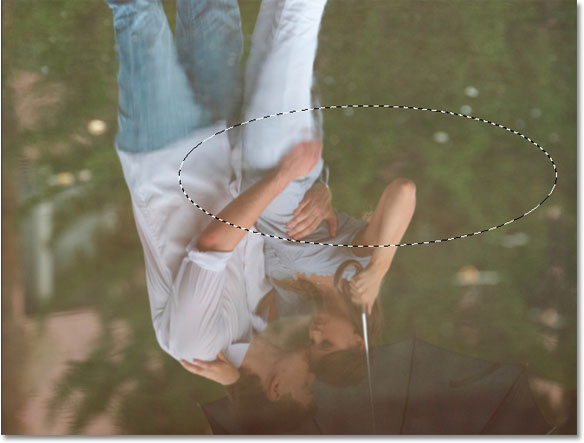
Draw your first elliptical choice.
Step iii: Make Ii Copies Of The Selected Area
With the choice outline in place, press Ctrl+J (Win) / Command+J (Mac) on your keyboard twice to make two copies of the selected surface area (you can also go up to the Layer menu, choose New, and then cull Layer via Copy twice, but the keyboard shortcut is much faster). Each copy volition be added to its own layer in the Layers panel. The top layer will exist selected (highlighted in blue):
Two copies of the selected surface area appear higher up the Background layer.
Step 4: Plough Off The Top Layer Temporarily
We need to hide the top layer for the moment, so click on its layer visibility icon (the eyeball) on the far left of the layer in the Layers console, which will temporarily hide the layer from view in the certificate window:
The eyeball will disappear when you click the icon, letting yous know the layer is now hidden.
Footstep v: Select The Layer Below It
With the top layer now subconscious, click on the layer below information technology in the Layers console to select information technology:
Click on the bottom of the two layers to select it.
Step 6: Load A Selection Around The Layer's Contents
Hold down your Ctrl (Win) / Command (Mac) key and click directly on the layer's preview thumbnail in the Layers panel:

Concord downward Ctrl (Win) / Command (Mac) and click on the layer preview thumbnail.
This places a selection outline around the contents of the layer in the document, which ways the selection outline you lot drew a moment ago will reappear. The reason nosotros're loading the selection outline before choosing the filter, which nosotros'll exist doing next, is to limit the filter's outcome to the area inside the selection, otherwise Photoshop would utilize it to the unabridged paradigm:
The pick outline reappears in the document.
Step vii: Apply The ZigZag Filter
Equally I mentioned at the beginning of the tutorial, Photoshop really ships with a filter built specifically for adding water ripples to an paradigm, but y'all'd never gauge which 1 it is merely by glancing at the filter names. The i we want is non Ripple or Body of water Ripple. It'southward called ZigZag (yes, that's correct, ZigZag). Go upwards to the Filter carte in the Menu Bar along the top of the screen, cull Misconstrue, so cull ZigZag down at the lesser of the list:
Go to Filter > Distort > ZigZag.
The ZigZag filter works by distorting the image into the shape of water ripples. At the bottom of the filter'southward dialog box is a Style choice which controls how Photoshop distorts the image. There's three choices - Around Center, Out From Middle and Pond Ripples (the default setting). Each one gives us a slightly different water ripple effect, and one will normally produce better results than the other two depending on the surface area of the epitome you've selected. Effort each one and approximate the results in the preview window in the upper left of the dialog box. I'm going to stick with the default Swimming Ripples, but a unlike choice may work meliorate for you lot:

Choose the Style pick that works all-time for the expanse of the image you lot've selected.
The Amount slider controls the intensity of the water ripple upshot, while the Ridges slider changes the number of ridges. Continue an middle on the preview window in the dialog box to preview the results as you elevate the sliders left and right (the effect isn't actually applied to the image until you lot click OK). We're going to exist running the ZigZag filter twice, once on each of the two layers we created. For this initial ripple effect, add lots of ridges. These will appear around the outer edge of the ripple when we're done. I'g going to increment my Ridges value to effectually 12 and I'll increase the intensity of the consequence by setting the Corporeality value to around 70:
Change the advent of the water ripple with the Corporeality and Ridges sliders.
Click OK when yous're done to leave out of the dialog box and apply the filter to the selection:
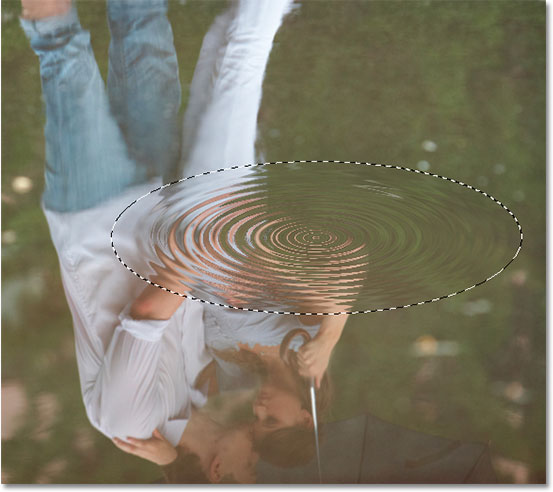
The initial water ripple consequence.
Footstep 8: Select The Top Layer And Turn It Back On
Click on the top layer in the Layers panel to select it, then click on its layer visibility icon to turn the layer dorsum on in the certificate:
Select and plow on the elevation layer.
Footstep 9: Employ The ZigZag Filter Again
We need to apply the ZigZag filter again, this time to the meridian layer. Since it was the concluding filter we used, we can quickly access its dialog box past pressing Ctrl+Alt+F (Win) / Command+Option+F (Mac). The effect nosotros apply to this elevation layer will get the center area of the water ripple, and the center ordinarily has fewer ridges than the outer edge, which ways nosotros'll need a more subtle effect this fourth dimension. I'one thousand going to modify my Style pick to Out From Center and I'll lower the Ridges value to iv. The Out From Eye fashion tends to give a less intense upshot than the other ii styles, so to compensate, I'll increment my Amount value to 100:
Modify the appearance of the h2o ripples with the Amount and Ridges sliders.
Click OK when y'all're done to once again exit out of the ZigZag filter dialog box. The second water ripple appears inside the selection on the top layer:
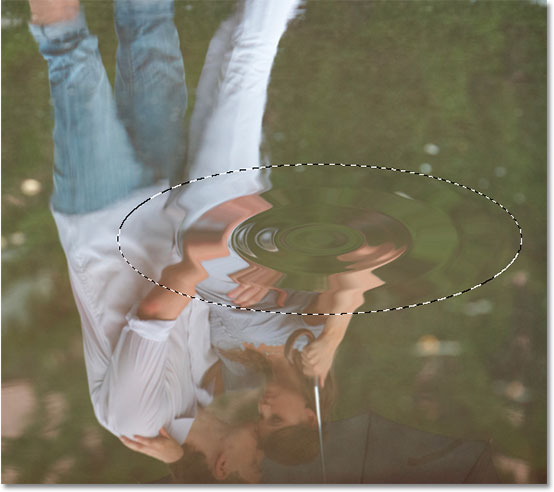
The second, more than subtle h2o ripple upshot.
Step ten: Make The Selection Outline Smaller With Transform The Selection
Become up to the Select carte at the top of the screen and choose Transform Selection:
Go to Select > Transform Selection.
The Transform Option control works very similar to Photoshop's Complimentary Transform command except that it affects the pick outline itself, not the pixels inside the pick outline. Hold down Shift+Alt (Win) / Shift+Option (Mac), click on the handle (the small square) in the top left corner of the Transform Pick bounding box, then elevate the handle in towards the heart of the choice until the selection outline is around 50-lx% of its original size. Holding the Shift key every bit you drag constrains the shape of the option outline, while the Alt / Choice key allows united states to resize the pick outline from its center. Press Enter (Win) / Render (Mac) when you're washed to accept the transformation:
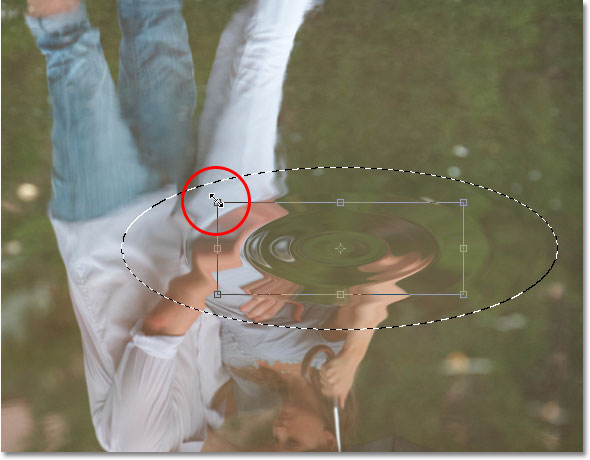
Reduce the selection outline to l-sixty% its original size.
Step 11: Invert And Delete The Selection
Become up to the Select menu at the summit of the screen and choose Inverse, or press Shift+Ctrl+I (Win) / Shift+Command+I (Mac) to access the same command with the keyboard shortcut:
Go to Select > Inverse.
This reverses our selection and so that the area in the center of the h2o ripple is now deselected while everything around it on the layer is selected. Press Backspace (Win) / Delete (Mac) on your keyboard to delete everything around the center of the water ripple, which reveals the more condensed ridges near the outer edge on the layer below. Press Ctrl+D (Win) / Command+D (Mac) to remove the pick outline from the document:
The water ripple effect is at present more subtle in the center, with more ridges near the outer border.
Step 12: Merge The 2 Layers Together
With the top layer selected in the Layers panel, become up to the Layer menu at the pinnacle of the screen and cull Merge Downward, or press Ctrl+E (Win) / Command+E (Mac) to admission the same command with the faster keyboard shortcut:
Go to Layer > Merge Down.
This merges the two h2o ripple layers onto a unmarried layer:
The two layers have been merged onto a unmarried layer.
Step 13: Apply The Gaussian Blur Filter
The ZigZag filter can sometimes produce harsh, jagged areas in the water ripple, then let'southward soften them up a niggling by applying a subtle blur event. Go up to the Filter menu, choose Blur, then choose Gaussian Blur:
Go to Filter > Mistiness > Gaussian Mistiness.
This brings up Photoshop's Gaussian Blur dialog box. Nosotros demand only a small amount of blurring to soften the edges. A Radius value of around 0.4 pixels is commonly all it takes:
A very small amount of blurring is all we need.
Click OK to get out out of the Gaussian Blur dialog box, and our first water ripple has been added to the image:
The water ripple later on softening any harsh areas with Gaussian Blur.
Step 14: Repeat The Steps To Add More Water Ripples Equally Needed
To add more water ripples to the image, start by clicking on the Groundwork layer in the Layers console to select the original paradigm, then simply repeat steps 2-13 for each h2o ripple you need to add. Afterward you've created a couple of them and the steps become more than familiar to yous, it takes no time at all to add more than. Be sure to experiment with the different Style options in the ZigZag dialog box to see which one gives you the best results each time.
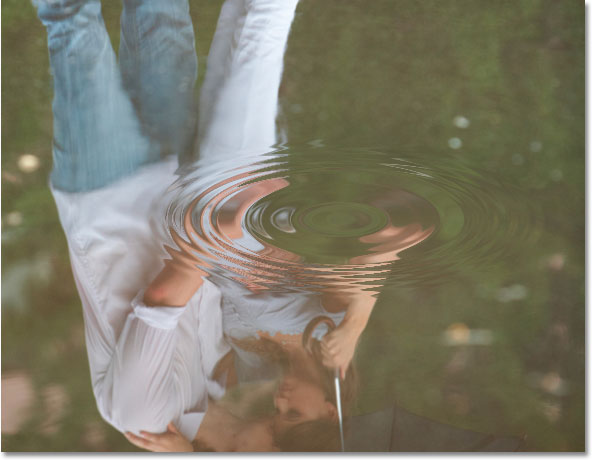
Here, after handful a few more than ripples around the surface of the h2o, is my final upshot:
The concluding water ripples effect.
Other Stuff
© 2022 Photoshop Essentials.com.
For inspiration, not duplication.
Site design by Steve Patterson.
Photoshop is a trademark of Adobe Systems Inc.
Source: https://www.photoshopessentials.com/photo-effects/water-ripples/
Posted by: millersathimpiou.blogspot.com
0 Response to "How To Make Water Animation In Photoshop"
Post a Comment